I made my own bias binding tape! Tutorial
Bias tape, or bias binding as it's also known, is one of those essential sewing items used to neaten edges and to add decoration. You can buy it pre-made, but you can also make your own in jazzy colours! It's often used around the edges of placemats, quilts, and babies bibs, and around the armholes and necklines of garments. See how the very talented Dana used it on a child's bathrobe here.
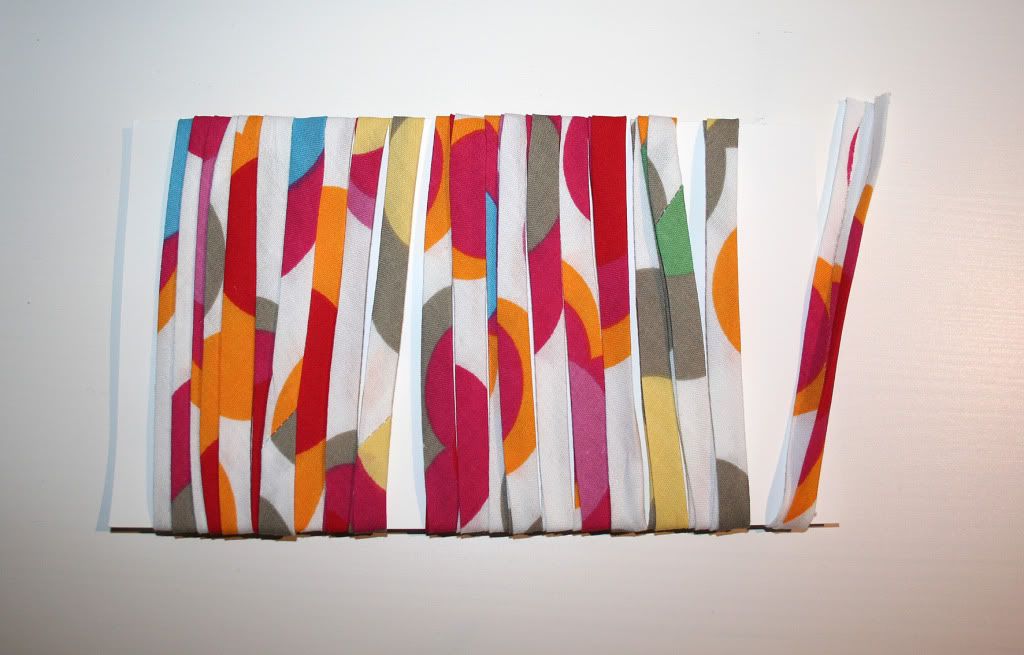
Here's some I made with a nifty little gadget I bought on ebay.
Now making your own does involve some mathematical algorithms....OK maybe not, but it does involve understanding the word diagonal and drawing lots of parallel lines. That's about as Einstein as it gets. Plus quite a bit of ironing......
Bias tape is cut on the bias of fabric (diagonal or cross-grain) to give it stretch and enable it to be worked around curves without puckering. Read on if you want to know how I achieved this miracle of haberdashery.
You'll need some fabric obviously, the bigger the better as you will be able to cut longer strips. I used some patterned curtains which I showed in my stash post
http://www.wagdoll.co.uk/2011/09/which-came-first-fabric-or-project.html
You also need one of these little gadgets - I bought this on ebay for a couple of quid.
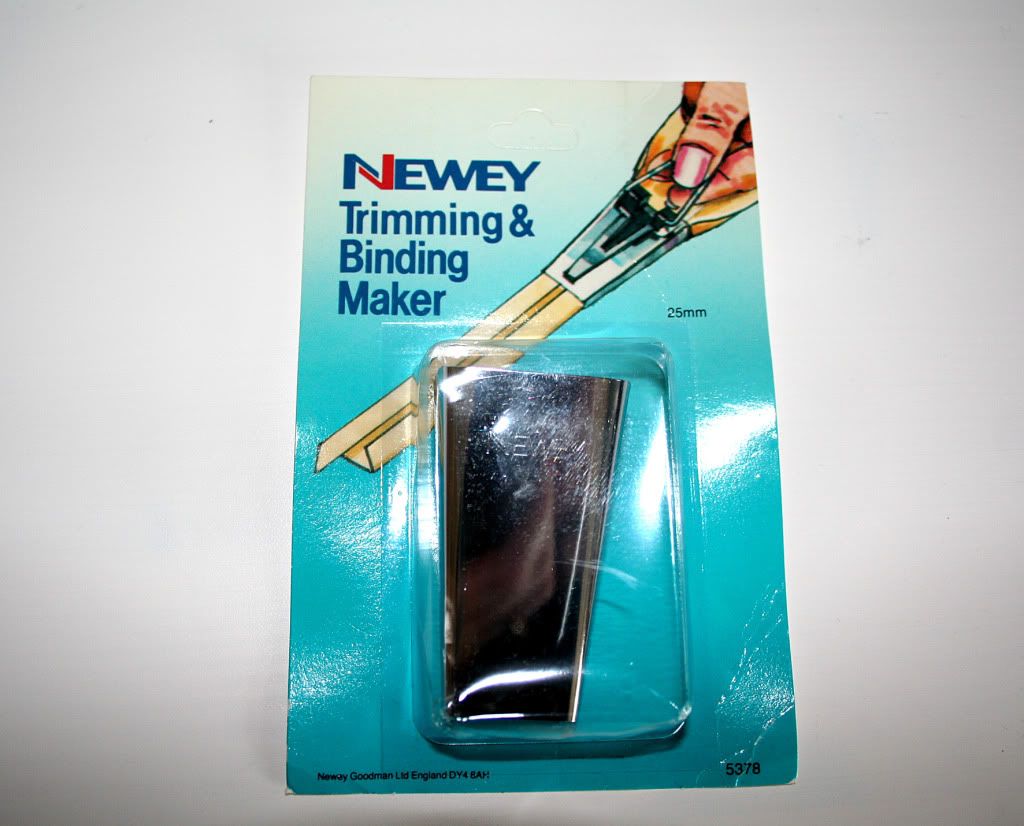
You can get them in different sizes, to make different widths. This one makes single fold binding approx 22mm wide.
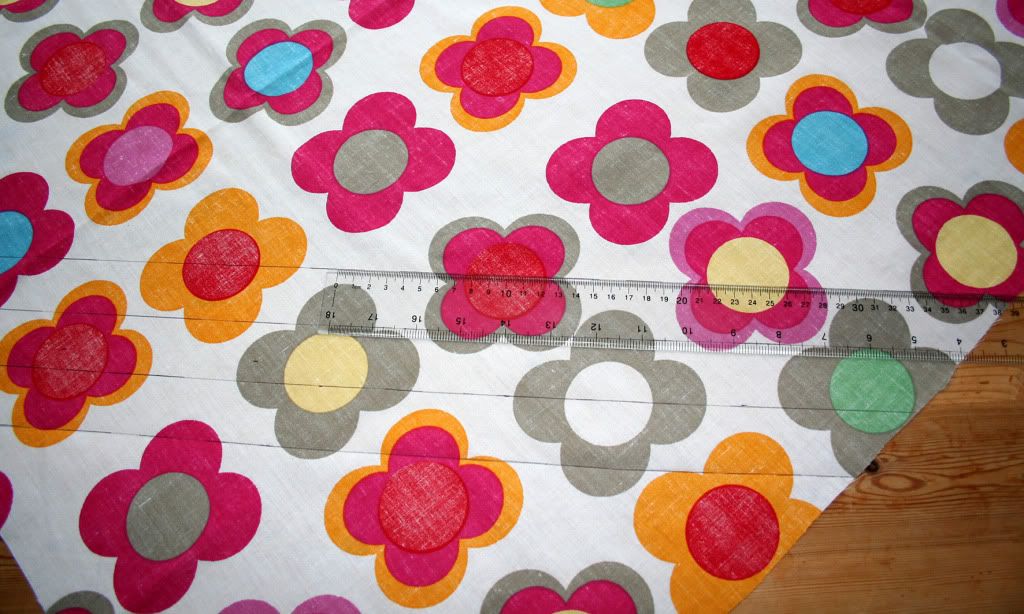
Draw a diagonal line across your fabric, at a 45 degree angle to the selvedge (to be honest I just eyeballed this) and then draw lines parallel to that. To make 22mm bias tape I had to draw lines 35mm width apart. A long ruler or yard-stick comes in handy here.


Here's some I made with a nifty little gadget I bought on ebay.
Now making your own does involve some mathematical algorithms....OK maybe not, but it does involve understanding the word diagonal and drawing lots of parallel lines. That's about as Einstein as it gets. Plus quite a bit of ironing......
Bias tape is cut on the bias of fabric (diagonal or cross-grain) to give it stretch and enable it to be worked around curves without puckering. Read on if you want to know how I achieved this miracle of haberdashery.
You'll need some fabric obviously, the bigger the better as you will be able to cut longer strips. I used some patterned curtains which I showed in my stash post
http://www.wagdoll.co.uk/2011/09/which-came-first-fabric-or-project.html
You also need one of these little gadgets - I bought this on ebay for a couple of quid.
You can get them in different sizes, to make different widths. This one makes single fold binding approx 22mm wide.
Draw a diagonal line across your fabric, at a 45 degree angle to the selvedge (to be honest I just eyeballed this) and then draw lines parallel to that. To make 22mm bias tape I had to draw lines 35mm width apart. A long ruler or yard-stick comes in handy here.
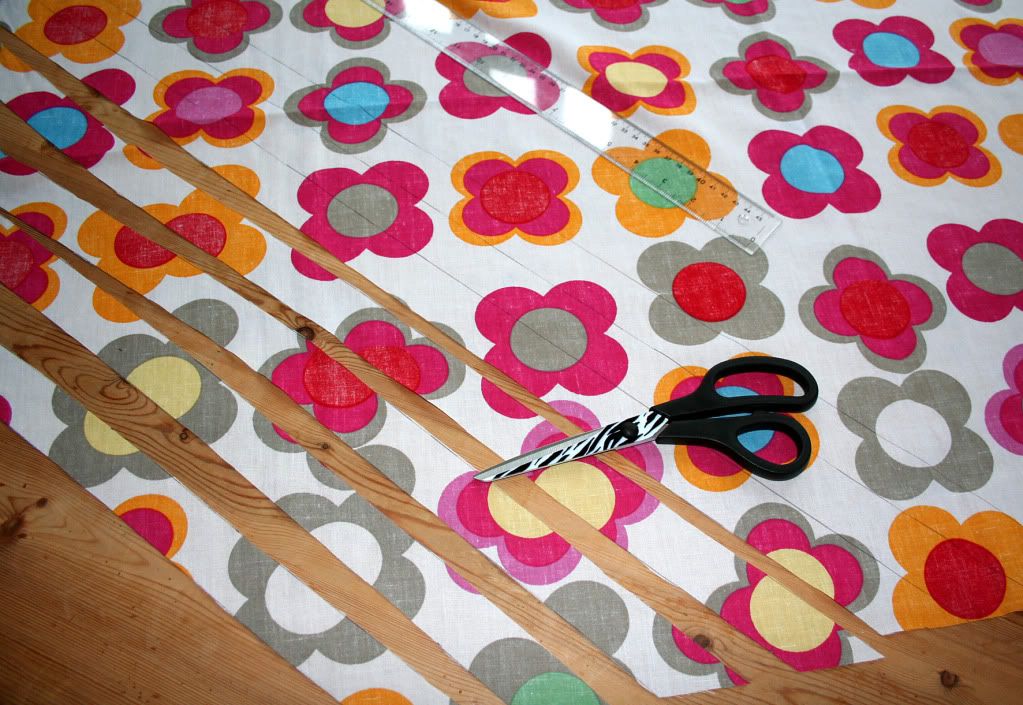
Cut out the strips, it's probably easier to do this with a rotary cutter and mat, but I don't have one so I went with the old-skool method of scissors.
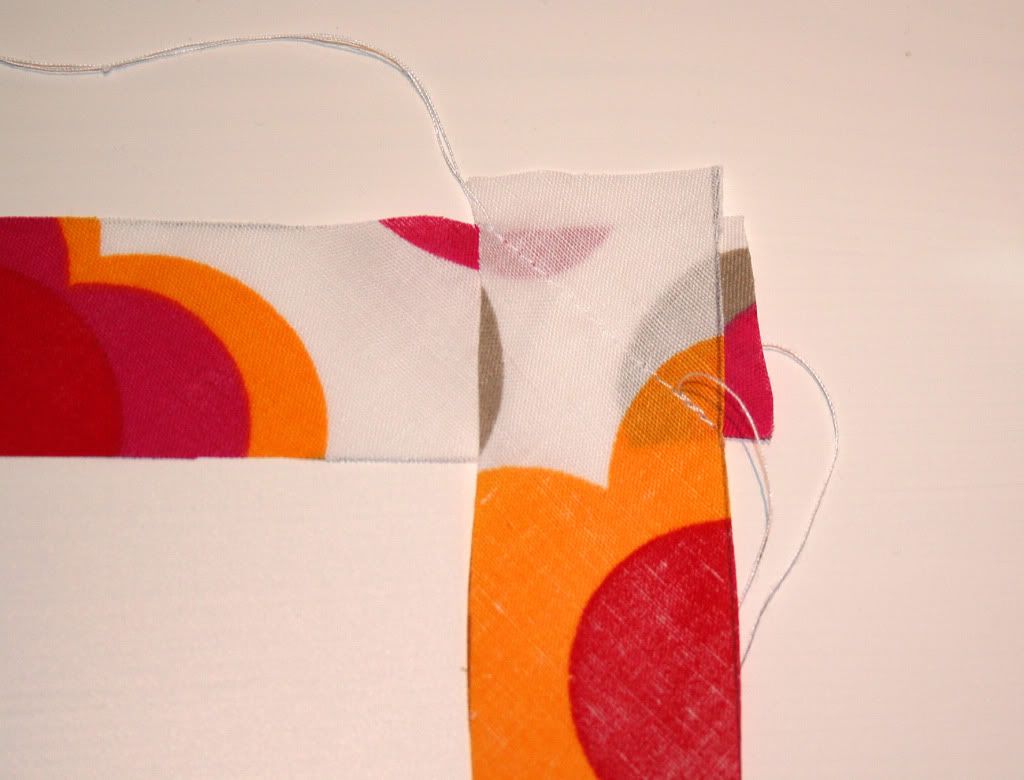
Now you need to join the strips to make one long strip. At your machine put the right sides together, pieces at right angles to each other, and sew across the diagonal, one corner to the other.
If you've got something that looks like this, then you're doing well! Repeat this step with all the strips to create a long continuous strip of fabric.
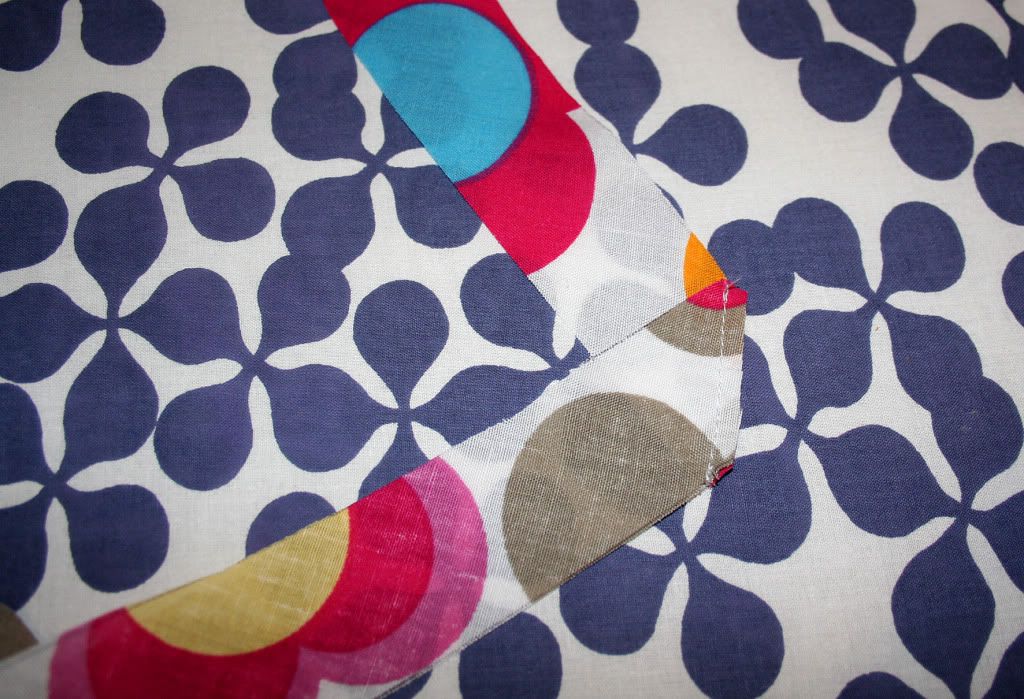 |
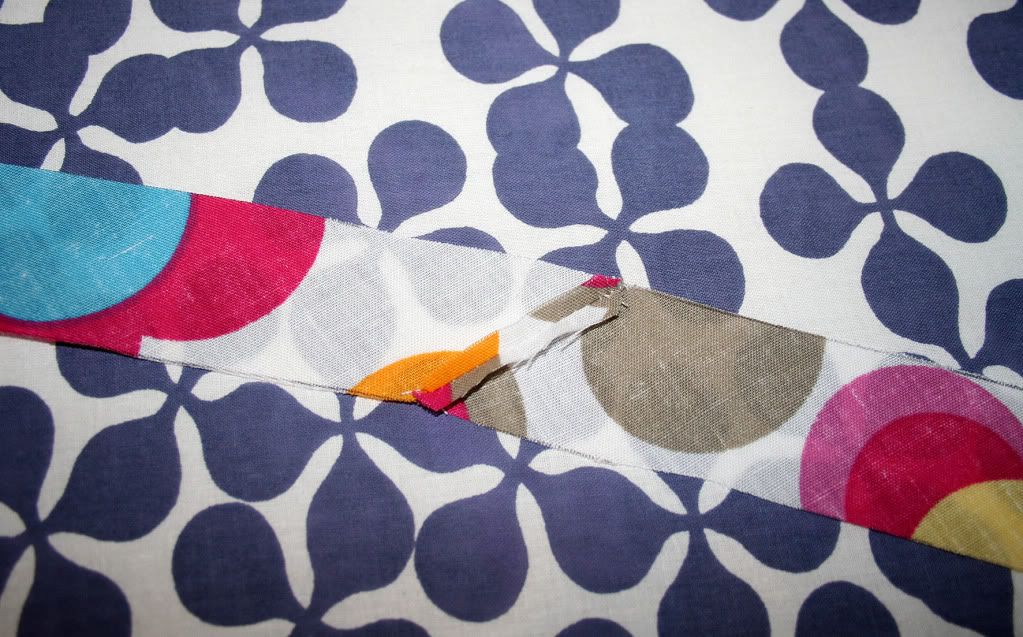
Trim the excess fabric from the seams
And press open
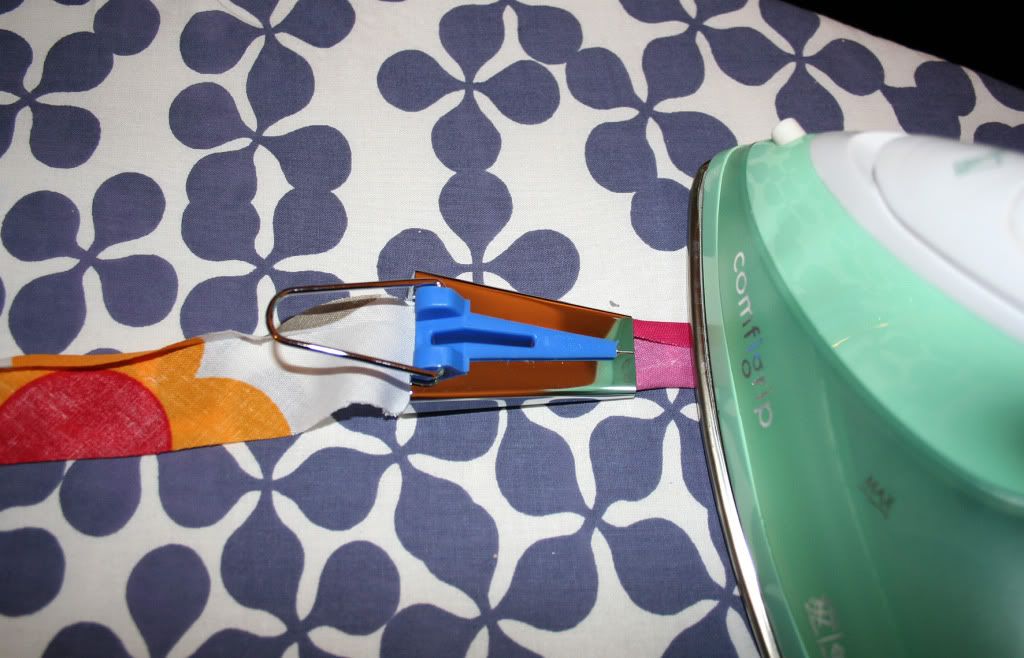
Now feed your continuous strip of fabric through the bias gadget, and watch it emerge from the other end in all it's folded glory. I pinned the folded end to my ironing board so I could 'pull' against it. It was easier to slide the gadget down the stationary fabric than try and pull the fabric through, you need more that 2 hands to do that and iron!
Iron the folded fabric as it emerges from the bias gadget, to make the folds permanent. Continue sliding the gizmo down the fabric and ironing. This type of binding is known as single fold (despite being folded at each edge).
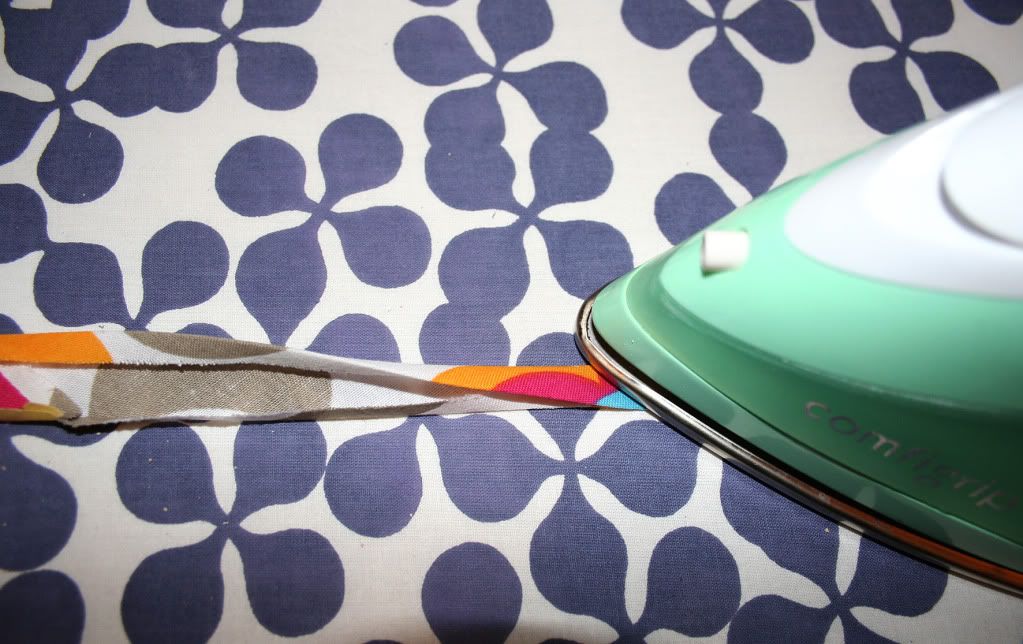
To make double fold bias tape, go back and iron all the way down your fabric strip, folding it in half to give you the finished bias binding. My double fold binding ended up as 12mm wide.
And here's the finished bias tape, all ready to bestow its crazy colour on a curvy project.
To be honest, this project is time consuming and I would only make my own tape to add decoration to an item, I certainly wouldn't go to all this bother for bias tape used on the inside of a project, you can buy pre-made tape cheaply online or in haberdashery stores.
You've also got to love ironing for this project, OK maybe not love but it's no good if you detest your iron, embrace it...well not while it's hot ...
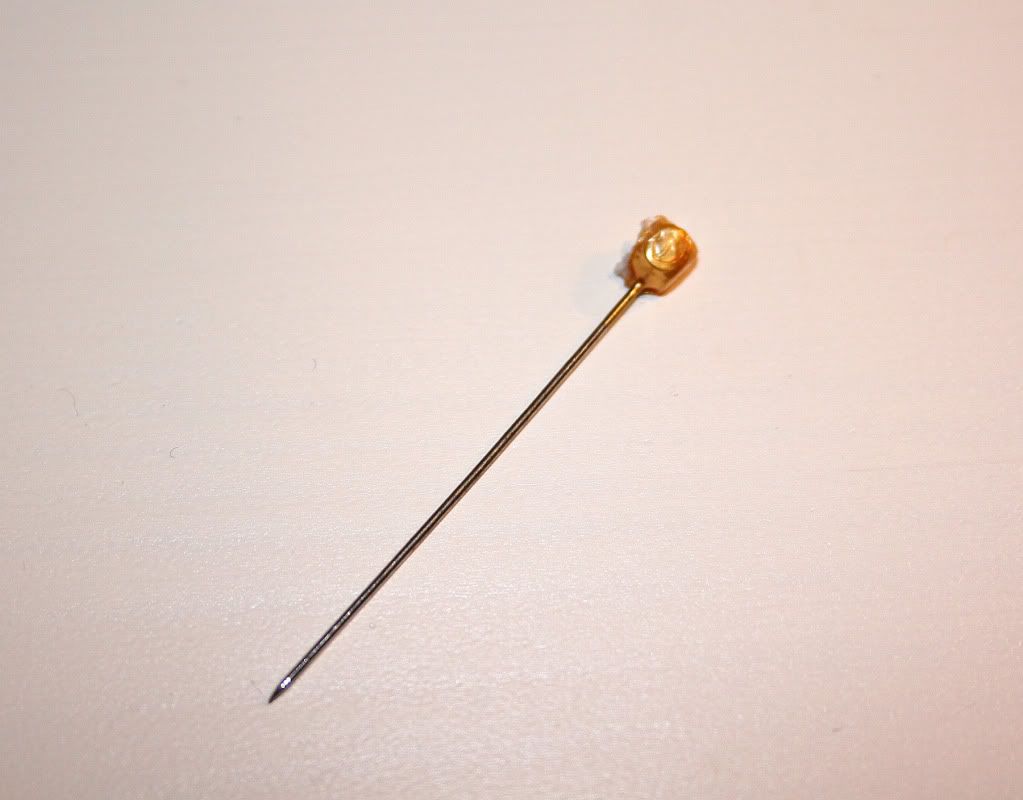
And talking of hot irons, don't use your best pins, the one I used to hold my tape to the ironing board sadly didn't make it through the ordeal...awwww :-(


Comments
Post a Comment
I love reading your comments, so let me know what you think! x