Silk Jewellery Pouch Tutorial (store your bling in style!)
Ahh bling, the frivolous accessories that transform a plain outfit into a vision of loveliness...or more likely remain in a tangled mess in an old shoebox. Jewellery needs good storage and practical ways of transporting it, think holiday packing. This is especially true if you are thinking of trading in some old items for new, whether it's a necklace, costume This is especially true if you are thinking of trading in some old items for new, whether it’s a costume necklace, diamond bracelet, or your favourite Rolex watch. So here's an oldie but goodie, the jewellery pouch.
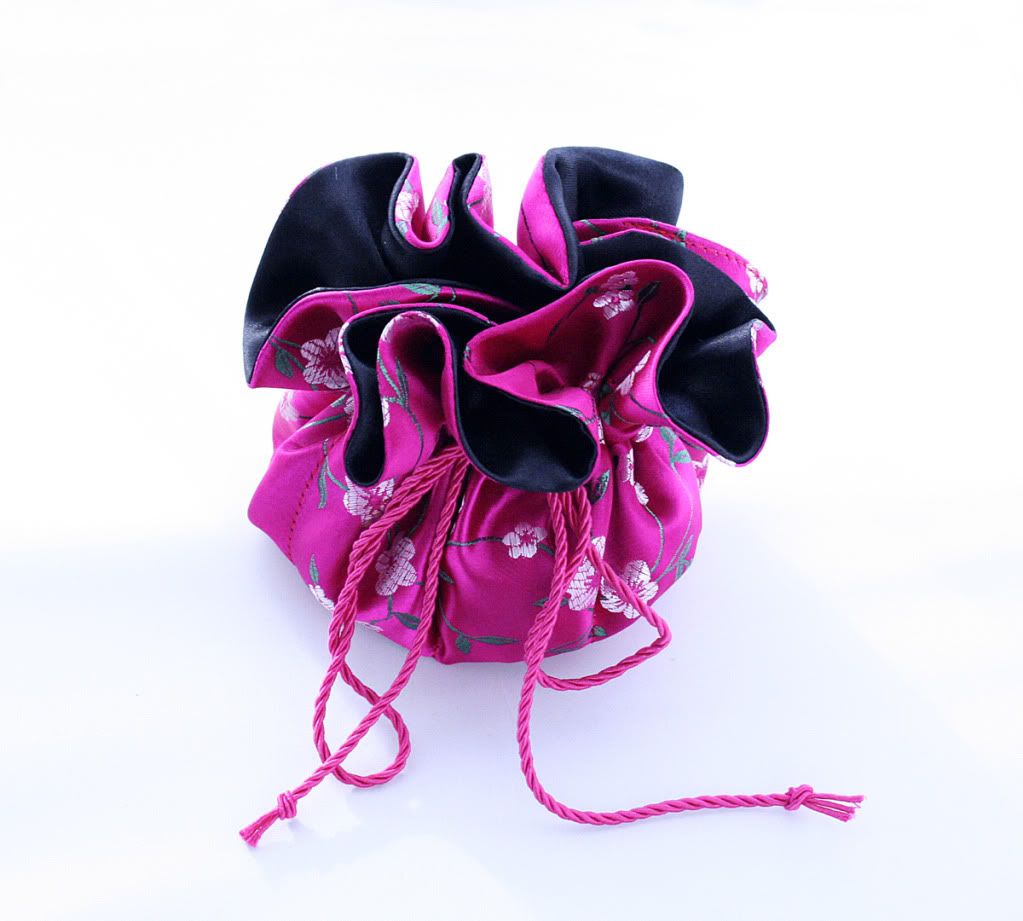
This little drawstring pouch opens to reveal a large central area to hold your chunky jewellery and bangles, and 8 little pockets to hold rings and smaller items.
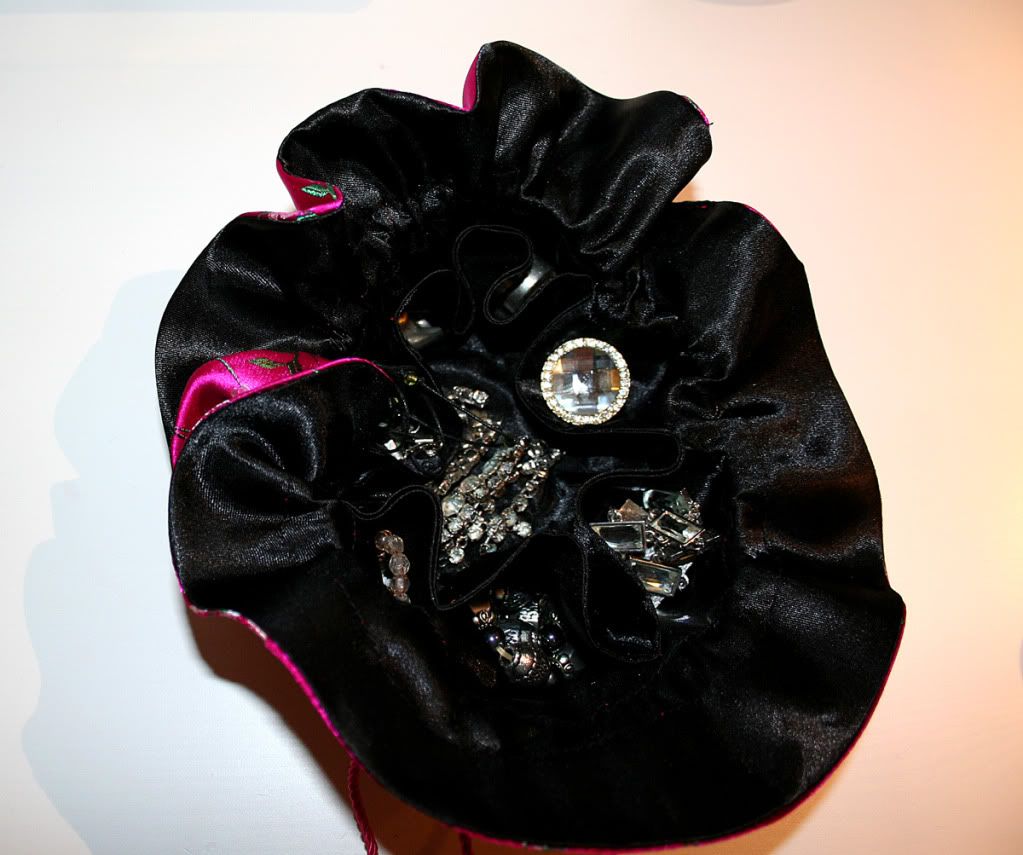

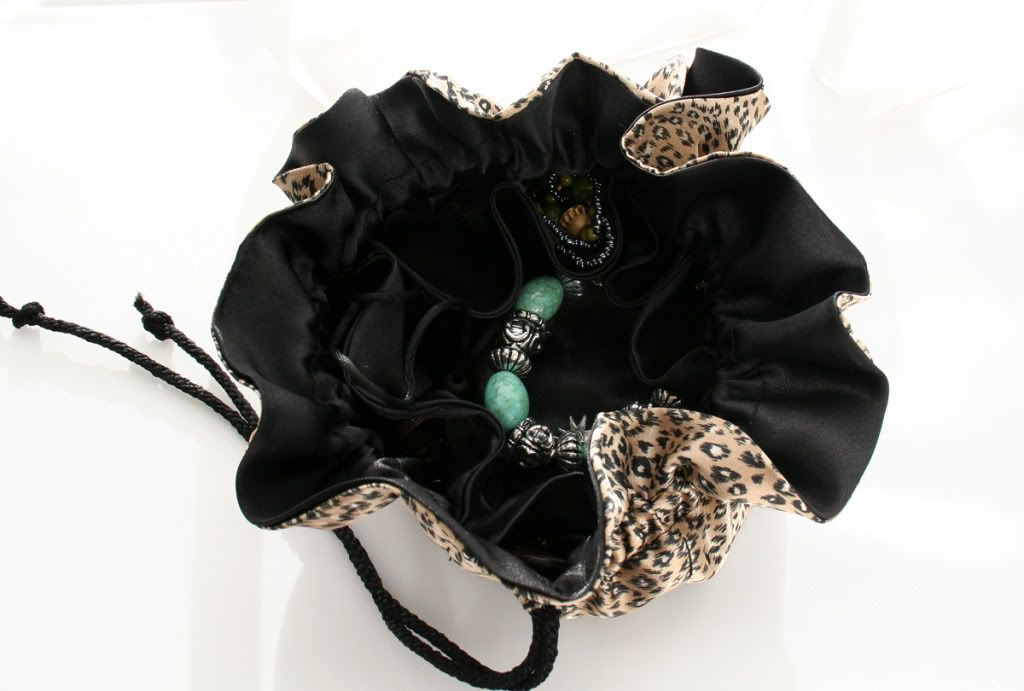


This little drawstring pouch opens to reveal a large central area to hold your chunky jewellery and bangles, and 8 little pockets to hold rings and smaller items.
(Check out my 'Ring of Thundera'...it's a real diamond, honest...!)
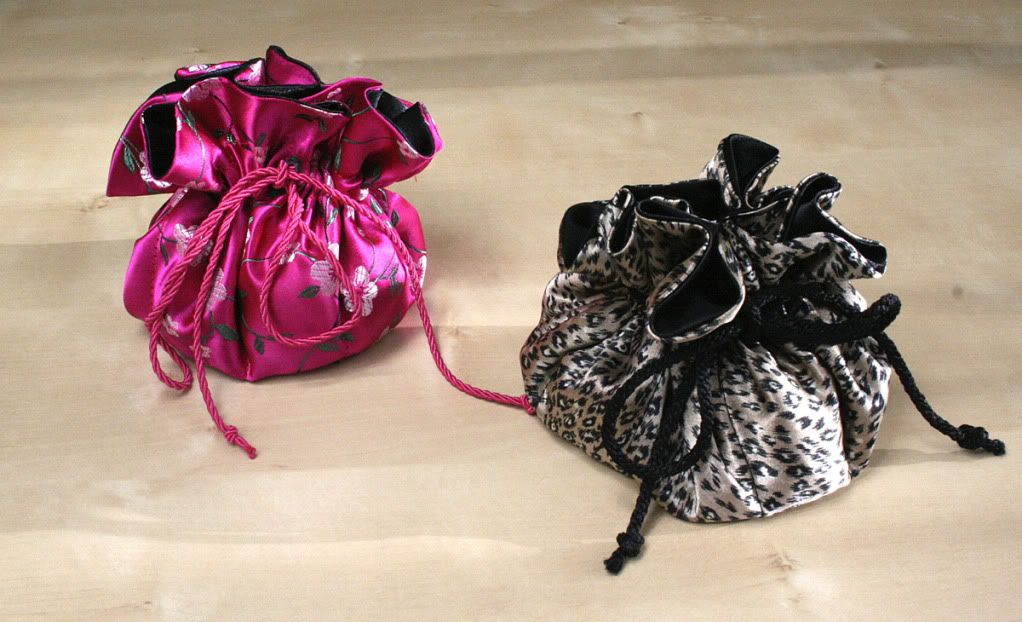
You can make the little pouch in endless colourways, using pretty much any light/medium weight fabric you want, but in this case I wanted to use silky fabrics, set off with a plain black satin lining. They're perfect for throwing in your suitcase, now that we're all starting to plan for summer holidays.
There are numerous tutorials online to make these little pouches, here's a tutorial on how I did mine.
Read more.....
Tutorial
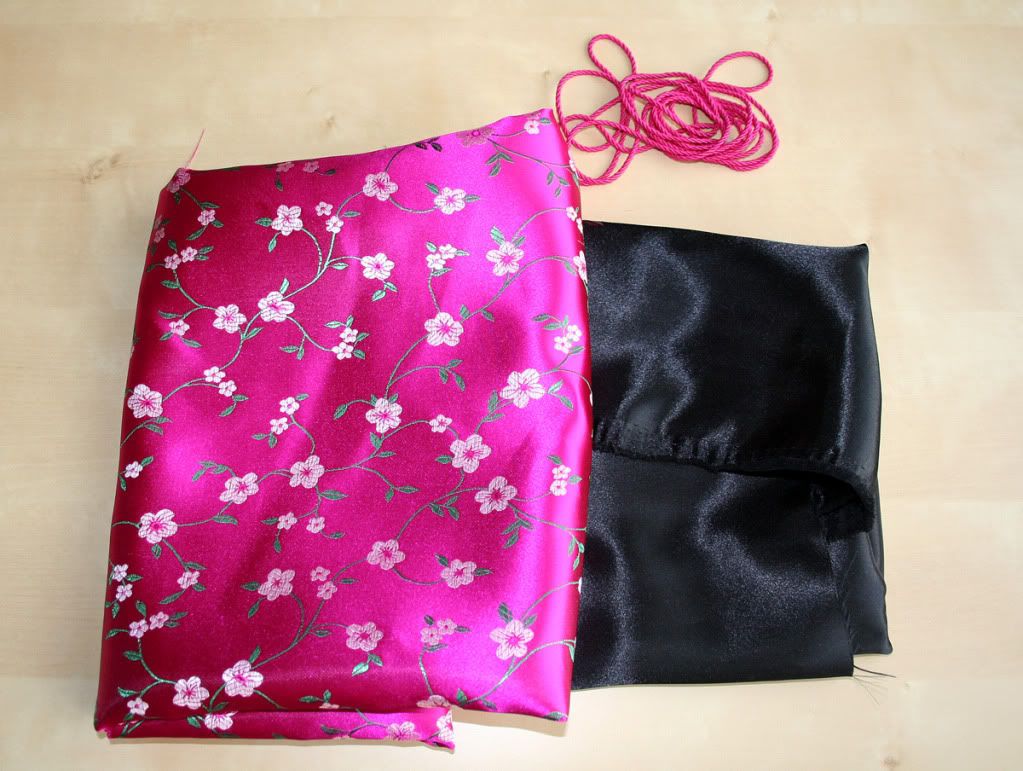
Choose a pretty fabric for the outer and a contrasting/matching fabric for the interior. I've chosen a lovely embroidered Chinese silk for the outer, and a medium weight lining satin for the interior, from The Remnant House in Harrogate. You can probably use scraps from your fabric stash as you'll need less than half a metre of each. Plus some rat-tail cord for the drawstring.
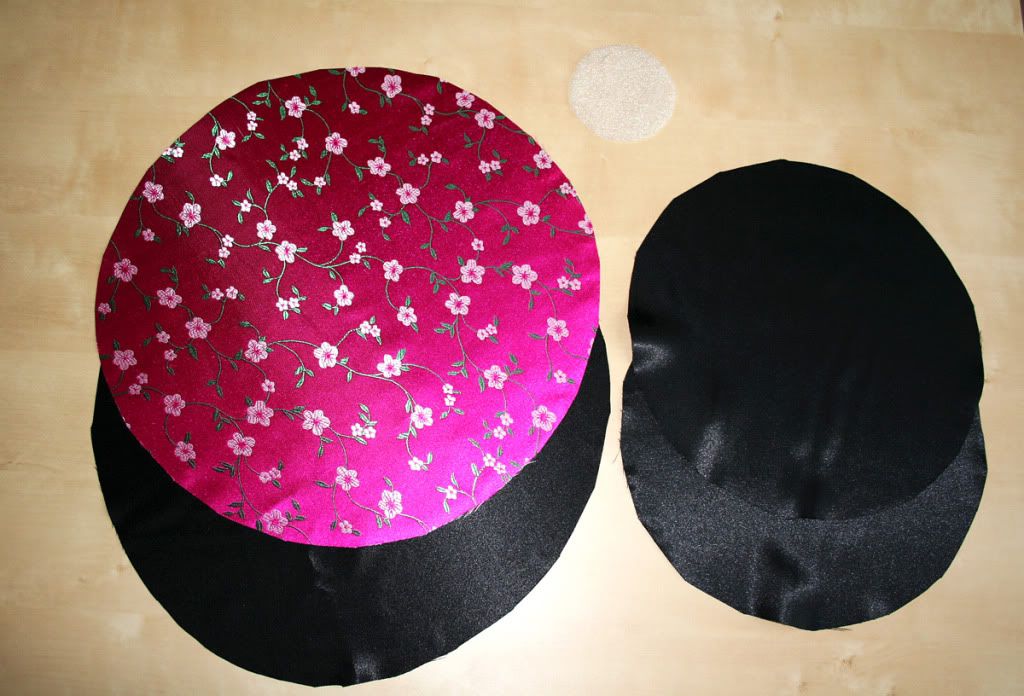
Cut out:
1 x large circle in outer fabric 18 cm radius (7inch) to give a circle measuring 36cm across (14inch)
1 x large circle in lining fabric 18 cm radius (7inch) to give a circle measuring 36cm across (14inch)
2x small circle in lining fabric 13cm radius (5inch) to give a circle measuring 26cm across (10inch)
1 x small circle of batting or heavyweight interfacing (I didn't have either, so used thin foam recycled from packaging!) 4cm radius (1.5inch) to give a circle measuring 8cm across (3inch)
You can vary the measurements to suit the size of pouch you want, and vary the combination of fabrics, I've seen a lot examples where one of the small circles are cut from a contrasting fabric.
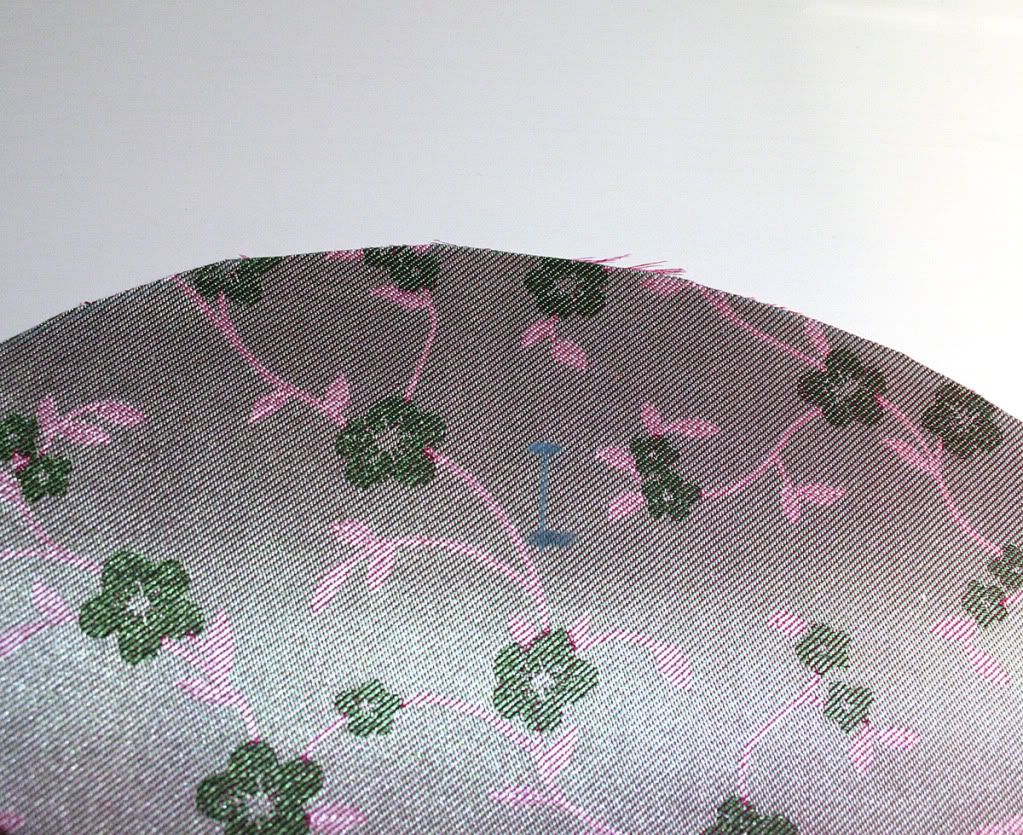
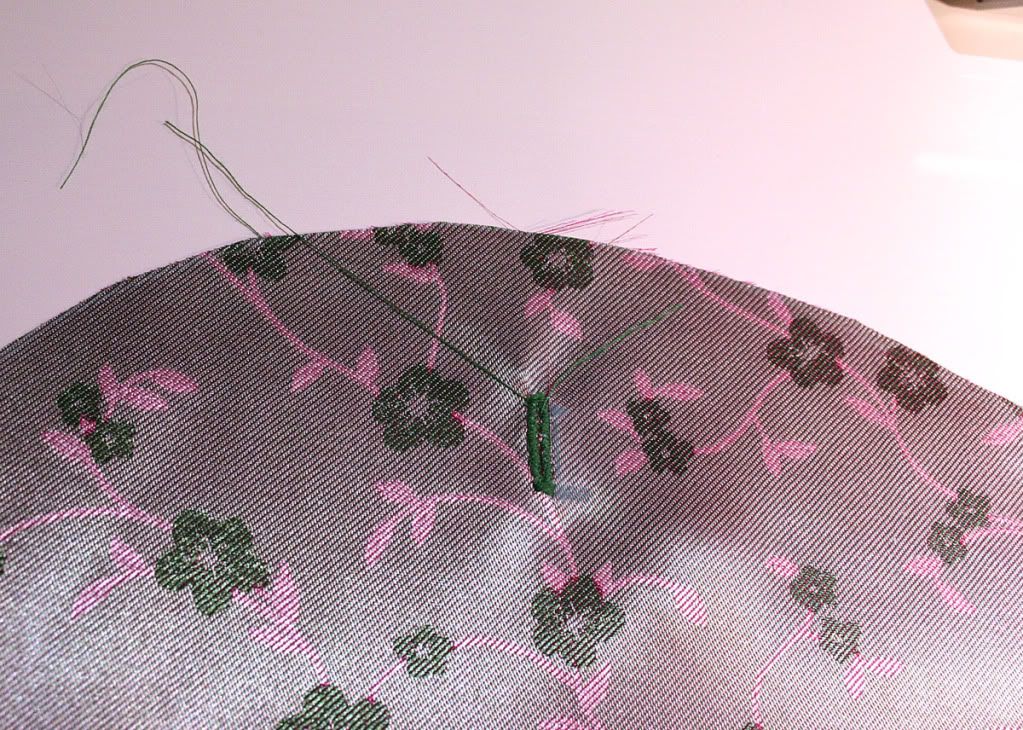
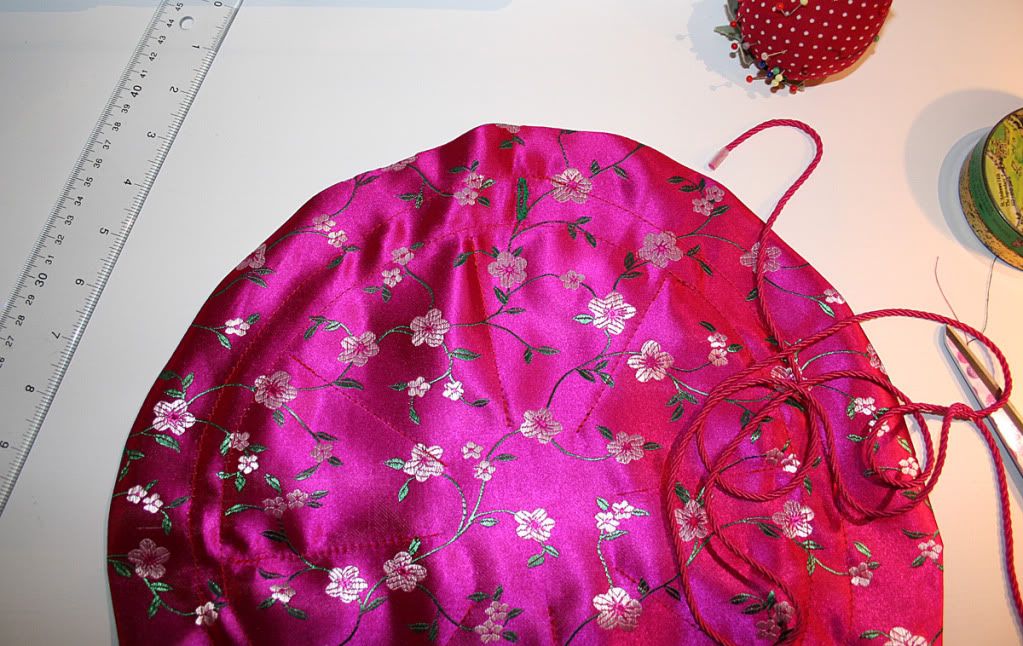
On the wrong side of your outer fabric, mark a button hole for the draw-cord, the top of the button hole needs to be 4cm (1.5inch) from the edge of the fabric.
Sew the buttonhole.
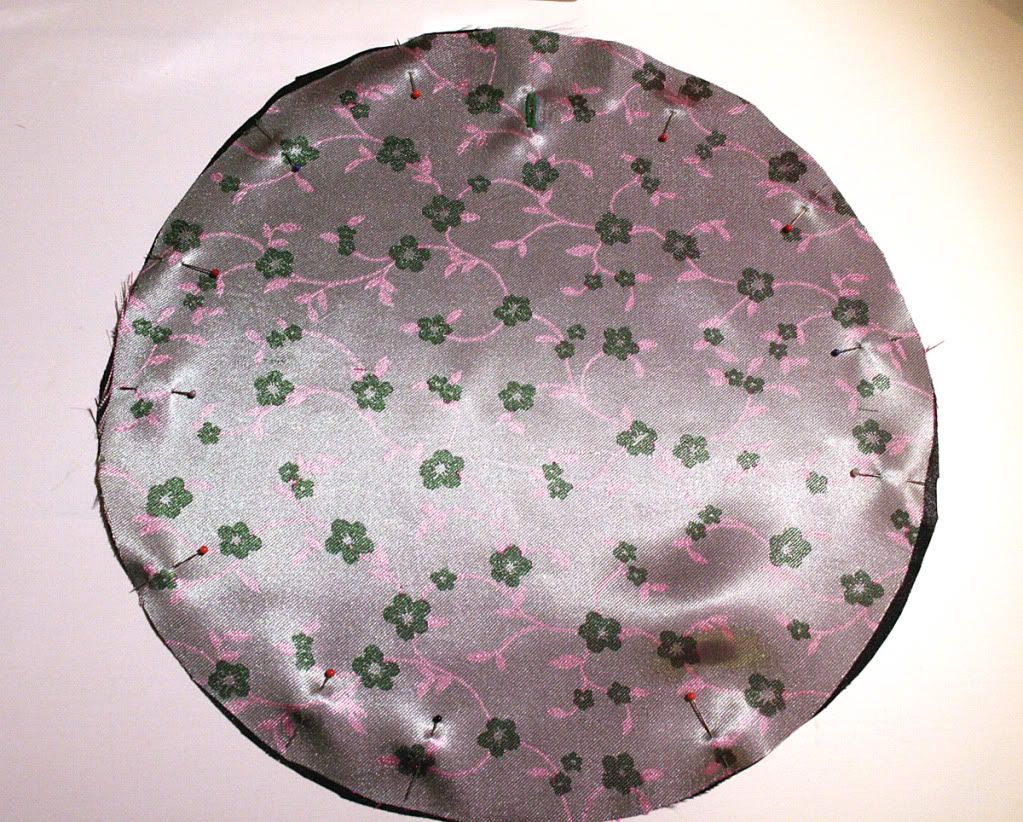
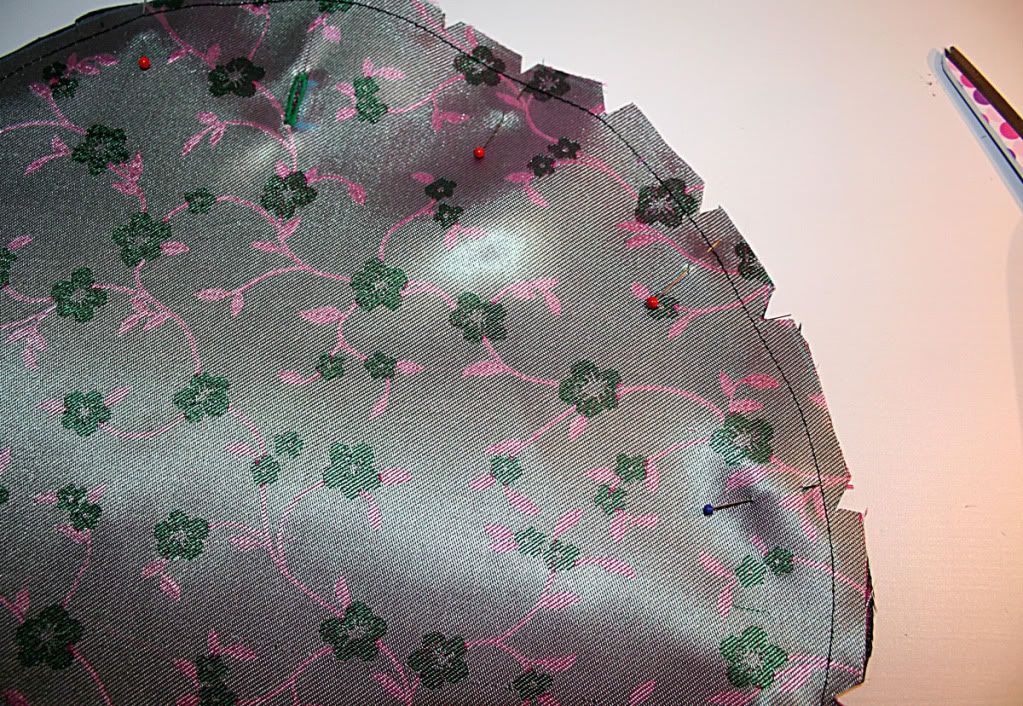
Right sides together, pin the 2 large circles together, and stitch round the outer edge, leaving a gap for turning right way out.
Clip notches out of the seam allowance to remove some of the bulk, do not snip through the stitches. Set to one side.
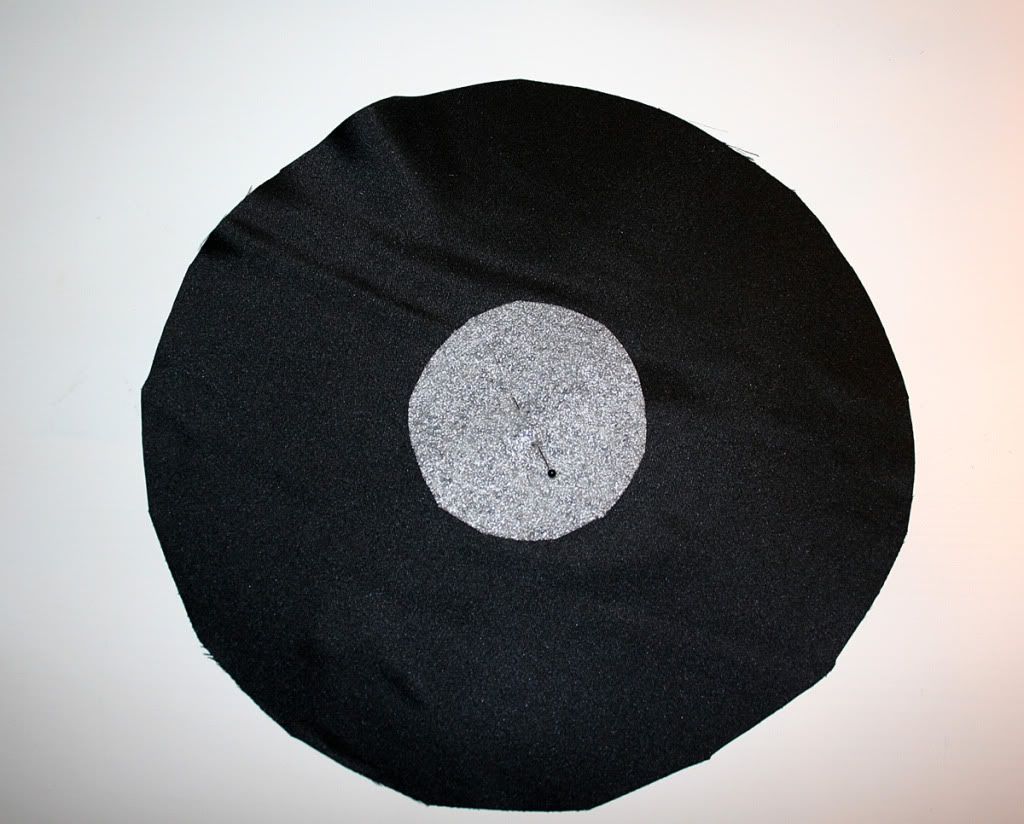
Take one of the small fabric circles and find the centre point of the wrong side. I did this by folding it into quarters and marking the point.
Attach the circle of batting/foam/interfacing to the centre of the small circle on the wrong side. Iron in place if using interfacing (remove pin first!), or stitch close to the outer edge if using foam or batting.
(Love this photo, it looks like a vinyl record ...7 inch singles, 45's and 33's...I'm getting all nostalgic!)
At this point I hit a slight snag, my machine wouldn't sew over the circle of (cheapskate) foam, I realise I need a Teflon or roller foot to sew over something like that, but since I had neither I used some greaseproof paper (baking parchment) to sew over and then just tore it off.
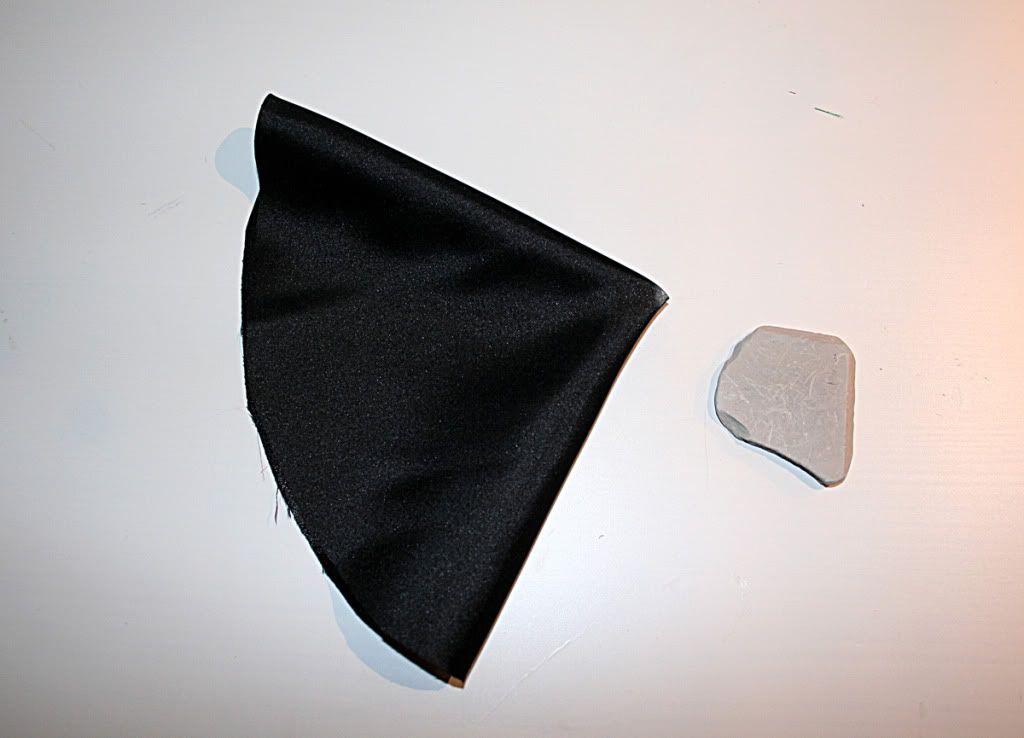
Join the the 2 small circles in exactly the same way you did before, right sides together, stitch and trim, leaving an opening for turning.
Turn both circles right sides out, press (be careful not to press over the foam circle area if you used foam), and slipstitch or topstitch the openings closed.
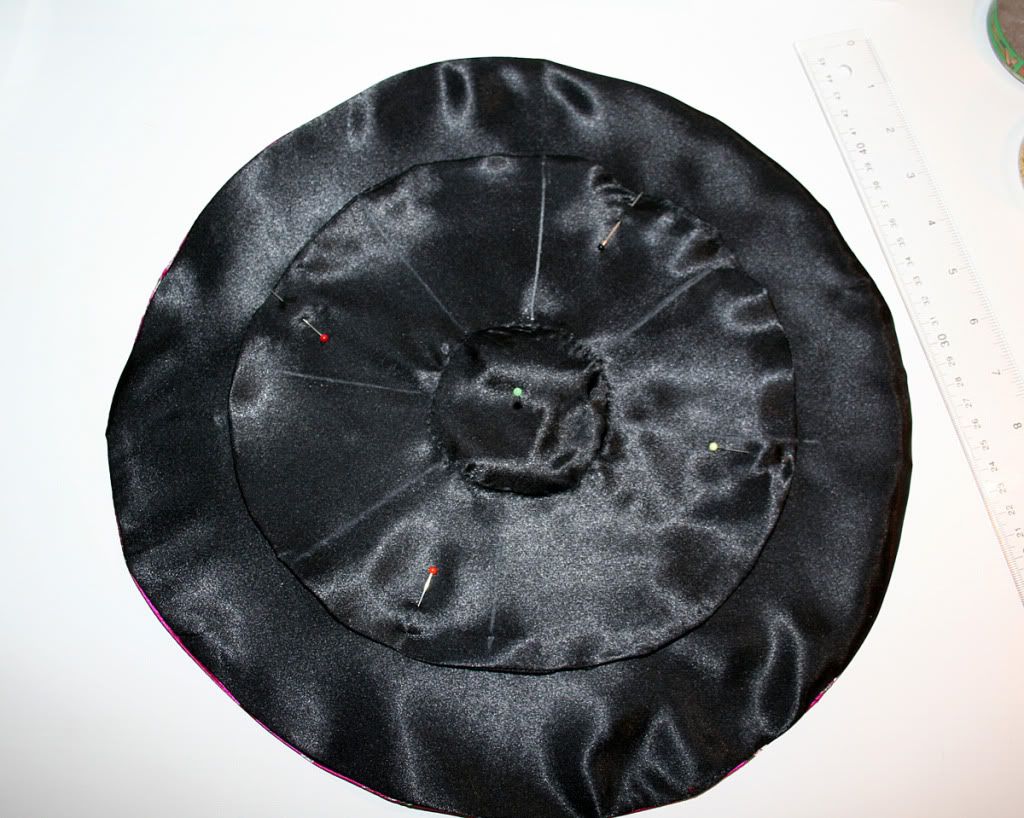
Now to attach the two circles together, place the small circle onto the lining of the large circle, matching the centre points. Using a ruler mark 8 equal lines on the inner circle as shown above, making from outer edge of the inner circle to the foam circle stitching line.
Sew over the foam circle stitching line to form the bottom of the pockets, otherwise small items can slip through .
Stitch the marked wedge lines, from outer edge of the small circle, stopping at the stitch line of the foam circle. Be sure to backstitch as these lines will experience some tension when used as pockets.
Almost there! Now to stitch the channel for the drawcord. Sewing on the large circle only, you need to create 2 circular seams with the buttonhole in the middle.
I'm sure you know what I mean and I'm over explaining but in more detail; On the large circle stitch a circular line all the way round as close to the edge of the inner circle as possible, be careful not to catch the inner circle fabric as you will 'close' the pockets. Stitch a parallel circle approx 2cm away, if your measurements were on target the button hole should lie within the 2 lines of stitching, adjust your stitch lines if necessary.
On this picture you can see the two lines of stitching which make up the drawcord channel, and the buttonhole lies between. Thread the cord through the channel.
Pull up the cord to close the pouch and tie. You're done!
I made two pouches in a couple of hours and I am very slow at sewing. I often read tutorials that say a project takes 20 minutes, and you can guarantee it will take me all evening, but I get there eventually and I enjoy the journey.
Once you know how to make these pouches they're very easy and a good way of using up fabric scraps, they'd make perfect gifts.
Here are the two I made, one for me, one for Wag Dollette....which do you think she chose?
(Please note: tutorial for personal use only, not for resale)


Comments
I would choose the pink one!
Greetings from Germany
Siebensachen
www.craftingrebellion.com
www.craftingrebellion.com
Have a nice day
Gloria
I am making these as family heirlooms from my mums wedding dress - 1950's
That way all the girls will have a nice, useful momento of their family tree.
And an evening bag to use at such an event too
Bridal Jewellery
Post a Comment
I love reading your comments, so let me know what you think! x