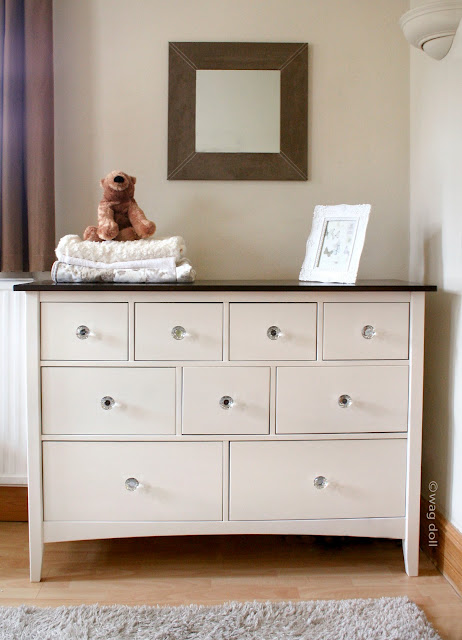
Nursery Chest of Drawers Makeover - A Spray Paint Tutorial.
...such a little person, so much kit and caboodle!
I had just the perfect cupboard in mind for this project, but no idea how to go about 'upcycling' it (is that actually a word?!). And so I poured over every blog, pinterest post and youtube tutorial on painting furniture and then got stuck in...
OK, so this chest of drawers has been in the family since the year dot and had taken a bit of a battering over its lifetime.
...and had long been consigned to a forgotten corner of the house.
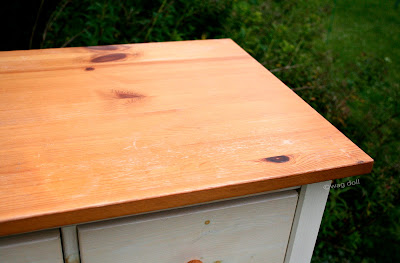
The 'knotty' whitewash made it look grubby, and it was missing most of its knobs. Two drawers had broken runners and the top had a very dated orange pine finish. Not to mention the scuffs and scrapes it had acquired over the years.
But the key to renovating furniture is to look past these issues, and look at the shape and construction of a piece.
I love these drawers as they're slim in width. They don't protrude far from the wall and I knew they'd fit perfectly in a small nursery room. Yet they pack a whole heap of 'stuff' in their deep and roomy drawers. And this piece is constructed from solid wood not chipboard or MDF, and deserved a new lease of life.
My step-by-step guide to renovating a chest of drawers.
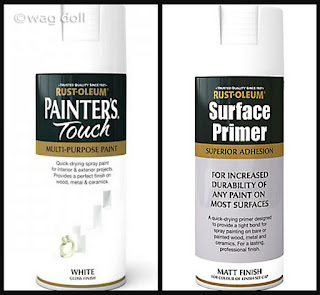
You will need;
In addition I used Ronseal Quick Dry Satin Interior Varnish in Walnut
As you can tell from the photo above, I prefer to spray paint outside (at the very least use a location with good ventilation), preferably on a warm non-windy day.
Handy tip: If you can, spray on your lawn. An old sheet protected the grass from the worst of the spray, and any over spray onto the grass disappeared the next time I mowed the lawn! Much easier than trying to remove spray from paving.
Step 1:
Remove all the hardware. Most of the knobs were already missing and I had purchased something waaaay more fancy!
Lightly sand all the surfaces to give a good 'key' for the spray to adhere to. I gave the varnished (and damaged) top a more thorough sanding. Brush away any dust and wipe down all the surfaces with a damp cloth.
Step 2:
Line the drawers up, fronts facing upwards and spray with primer. As I wasn't changing the colour drastically, merely covering up the grain and knots, 2 light coats of primer were sufficient.
Step 3:
While the drawers are drying, mask the cupboard top with newspaper and masking tape (the top will be varnished later). Spray the cupboard front, sides and legs with 2 coats of primer.
Step 4:
Spray the drawer fronts, cupboard front, sides and legs with 3 light coats in your chosen colour, in my case antique white. Allow to dry.
Handy tip, try to spray standing upwind, and wear old clothes with long sleeves and long trousers. Although the weather was calm when I sprayed, a few little gusts and a slight breeze meant my legs, clad only in shorts, also got a good coat of 'antique white'... not a good look!
Step 5:
Remove the masking tape and newspaper from the cupboard top, and paint with 2 coats of the walnut varnish (allow to dry thoroughly between coats).
Before the final coat of varnish, and to give a super smooth finish, very lightly sand the top in the direction of the grain with fine paper. Wipe with a damp cloth and allow to dry. Paint with a final 3rd coat of walnut varnish.
Step 6:
Repair the drawer runners. You can buy replacement runners from ebay or hardware stores, unfortunately these drawers were not standard size so Mr Wag Doll had to make some replacement wooden runners.
Re-attach the hardware, or replace with a good dose of bling like these Crystal Drawer Knobs. Love them!
I'm so pleased with how this project turned out, giving a makeover to old furniture is not as difficult as I imagined. Just be sure to work slowly and thoroughly, doing the prep work and allowing plenty of time for the paint to dry in between coats.
And so this much loved, and much worn, chest of drawers has been given a new lease of life. And has now gone to its new home along with the quick and easy quilt, ready for the arrival of a new baby!


Comments
Post a Comment
I love reading your comments, so let me know what you think! x