Fussy Cut Tote Bag - Sewing Tutorial
Hey lovelies,
Finally this enormous tutorial is ready. It's an epic, months in the making. Rejoice... for here comes the Fussy Cut Tote Bag!
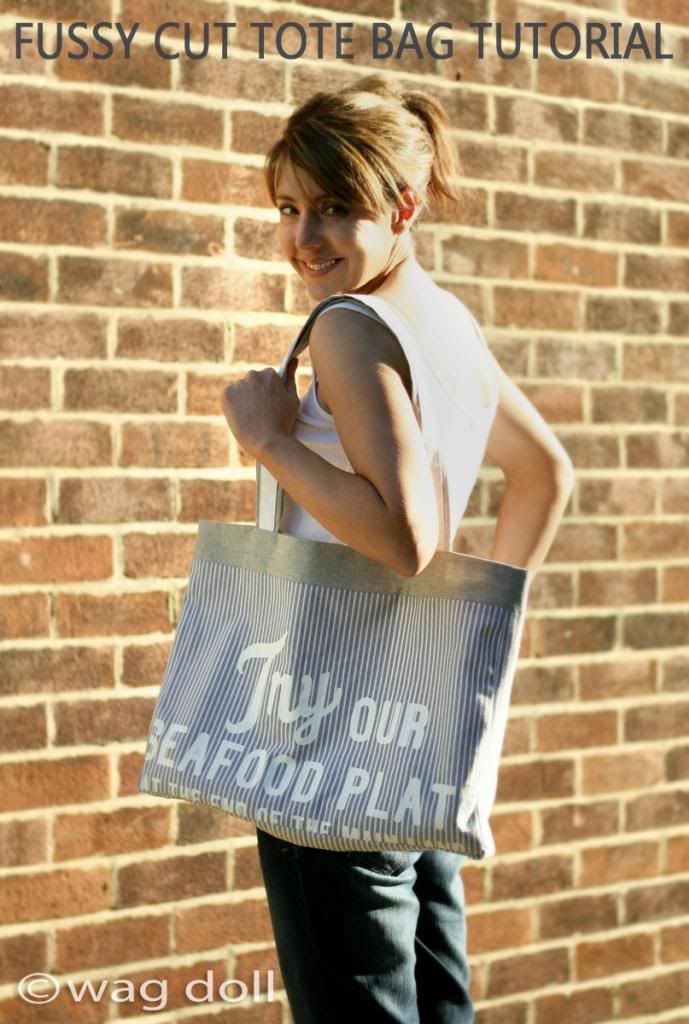
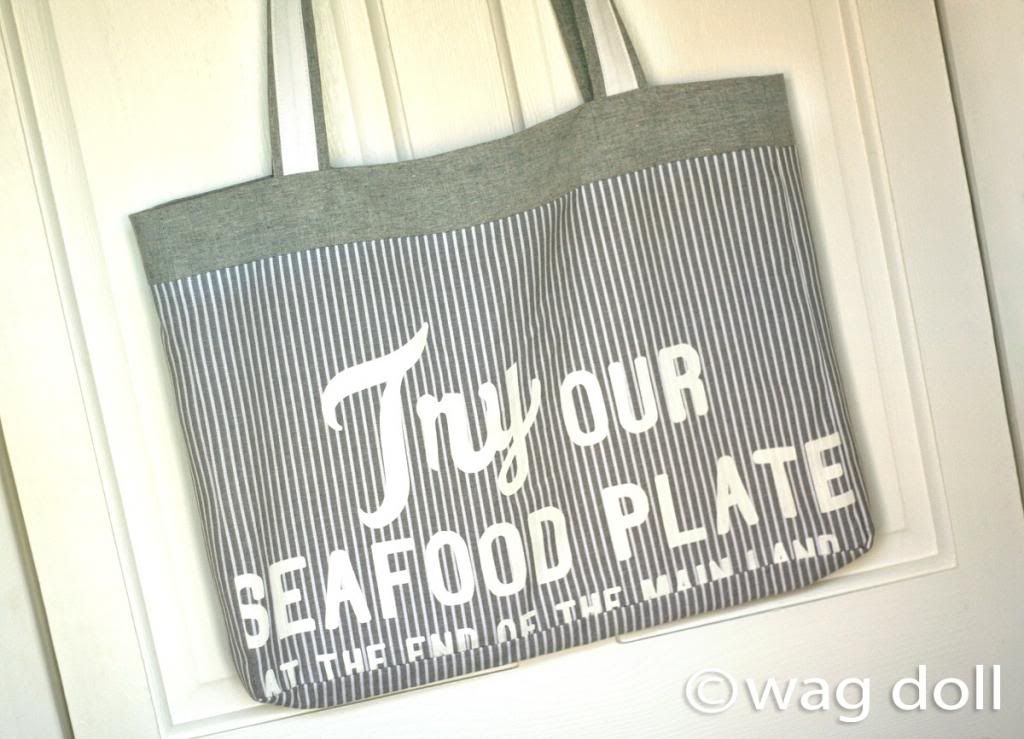
Fussy cutting is a technique where the fabric is cut to take advantage of the pattern, so in my case the script needed to be centred and the correct way up. It's a technique often used in quilting, to showcase a motif within a quilting square but the same idea applies here.

Of course you can make the bag in any fabric you like, I just fell in love with this fabric and knew I wanted to make a summer bag with it.

And that's not an arty 'hand near my face' pose, I'm shielding my eyes, it was actually sunny when we took these photos. Yes, my summer bag brought the sunshine to England...rejoice again people!

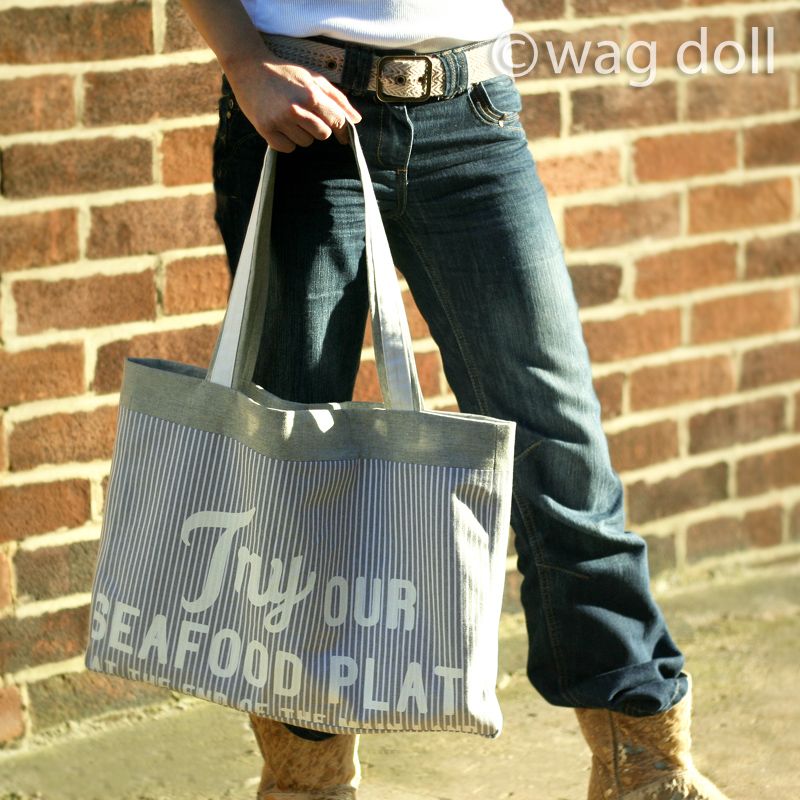
The bag is ultra roomy because the "travel light" concept is totally alien to me, "just in case" is my mantra. It's also fully lined and has a little interior pocket too.

Read on for a step by step tutorial. You know me, I've probably gone into too much detail, but better more than not enough.
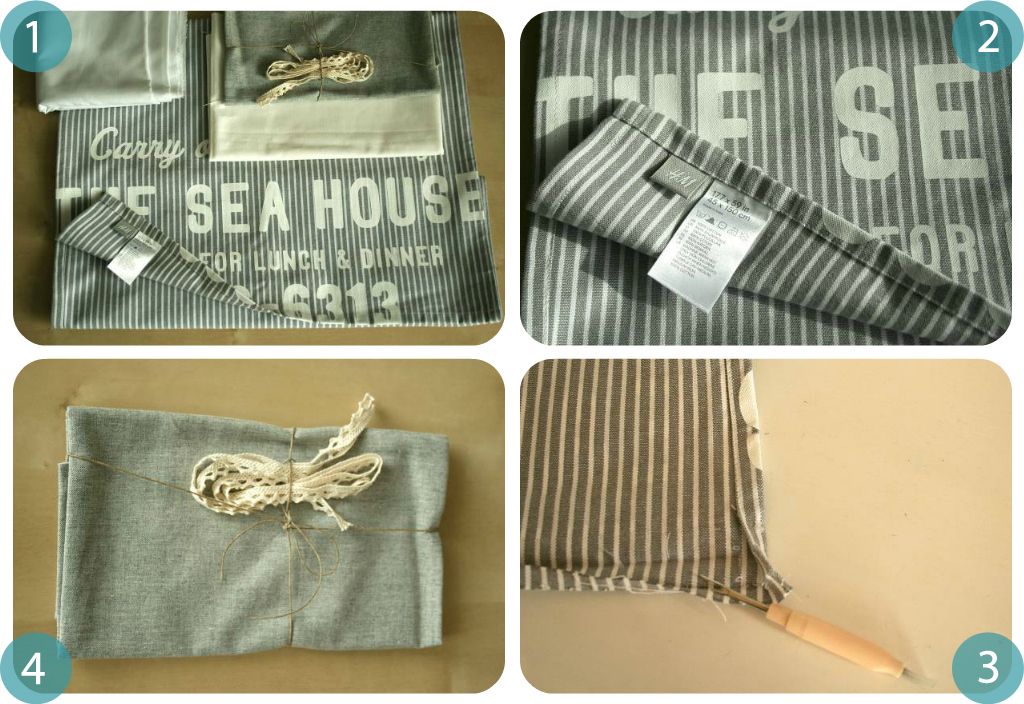
1 - Gather your fabrics - 1 yard main fabric (medium or décor weight), 1 yard lining fabric, half yard contrasting fabric for bag top & handles, quarter of a yard of fabric for accent on handles.
2 - My main fabric was a table runner - I try and think outside the box for sources of fabric.
3 - Because the table runner was only 19" wide, I had to unpick the hemmed edges to give me as much fabric as possible.
4 - I bought the plain grey linen from Ebay, look how the seller sent it, so cute (free crochet trim too!)don't you just love getting parcels like this in the post?
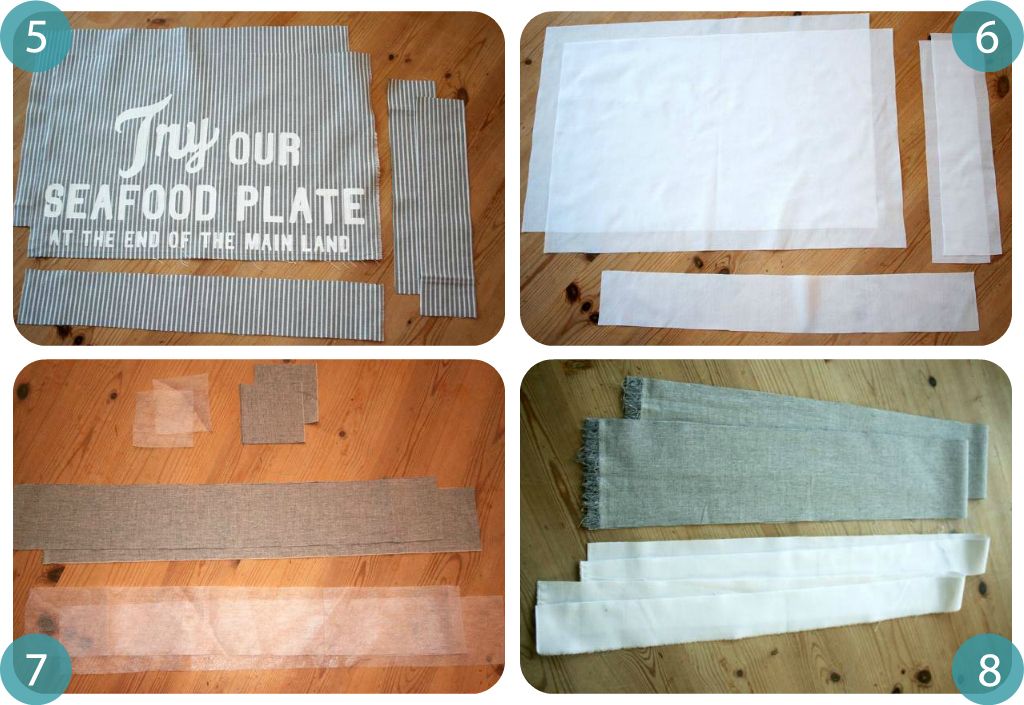
5 - Exterior: from your main fabric cut:
Front/back: 19" x 13" - 2 pieces. (I fussy cut the front piece of the bag to show as much of the writing as possible)
Bottom: 19" x 3" - 1 piece
Sides: 13" x 3" - 2 pieces
Patch pocket (not shown sorry!): 7" x 8" - 1 piece
6 - Lining: repeat cutting the same sizes and pieces from the lining fabric.
7 - Bag top: from the contrasting fabric (grey linen in my case) cut:
Bag top 19" x 3" - 4 pieces
Top sides 3" x 3" x 4 pieces
Note: In my case the linen is a lighter weight fabric than my main décor weight fabric, so I also cut matching fusable interfacing pieces to give the linen more strength and weight. You may or may not need to do this depending on the types of fabric you choose. Apply the fusable interfacing if you need it.
8 - Handles: from your contrasting fabric and accent fabric cut:
Contrasting fabric: 34" x 2 " - 2 pieces
Accent fabric: 34" x 2" - 2 pieces
Note: neaten all edges as you go along (zigzag/serger or pinking shears) and use 1/4" seam allowances.
9 - Fold main handle piece (contrasting fabric) in half lengthways, right sides together, and sew seam.
10 - Pull the tube through, right side out and iron flat with the seam in the middle.
11 - Fold 1/4" over on the accent fabric, along both long edges, wrong sides together and press.
12 - Top stitch the white accent onto the main handle piece, covering up the centre seam. Repeat for second handle.
13 - Pin the main front and contrasting top pieces right sides together (making sure the front piece is the correct way up fussy cutters!), sew seam and press open. Repeat for bag back.
14 - Pin the bag side (along short edge) and contrasting side top piece together, right sides touching, sew seam. Repeat for other side piece.
15 - Pin side piece to bag bottom, right sides together and sew seam.
16 - Repeat for other side piece, press all seams open, giving you a long piece of fabric as shown in the photo.

17 - Pin the bag bottom to the main bag piece right sides together, matching the centres. Continue pinning the sides to the sides of the main bag piece.
18 - Sew seam, easing as you go around the corners.
19 - Trim corners to reduce bulk and neaten edges. Repeat for the bag back section.
20 - Turn bag right sides out. Smile if all your seams meet perfectly at the corner :-)

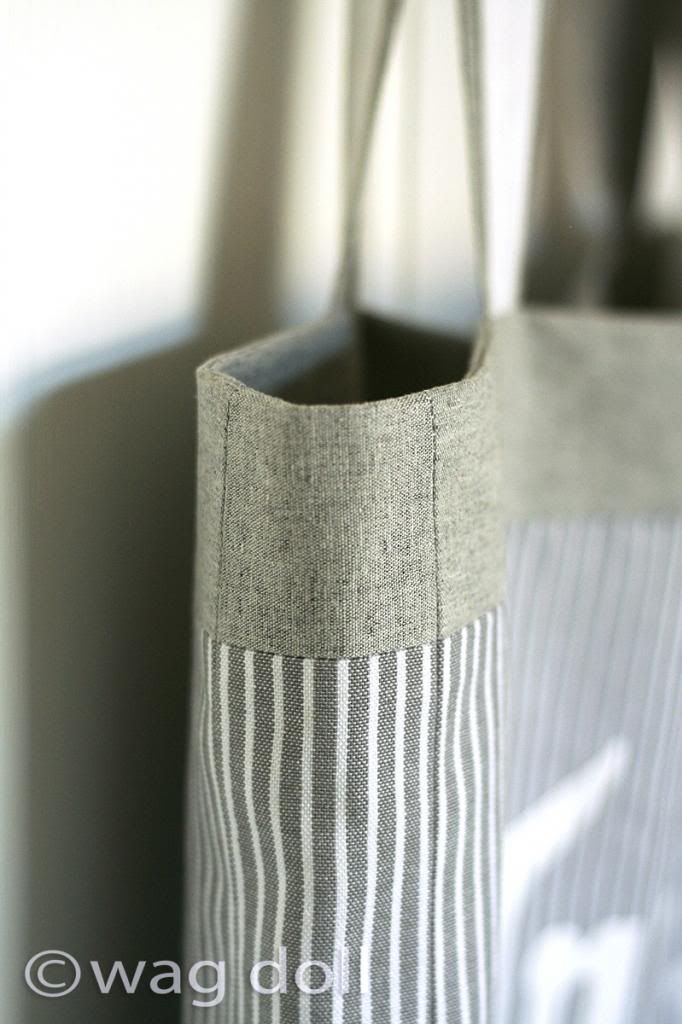
21 - Give everything a good press and your main bag section should now look like this.
22 - Grin if all your seams meet perfectly at the bag top :-)
23 - Repeat all steps for the lining pieces but....
24 - ....remember to leave an opening in one of the bottom seams for turning.
25 - Neaten edges on the patch pocket.
26 - Fold 1/4" over to wrong side on bottom and both sides, press. Fold top edge over twice to create a hem and top stitch in place.
27 - Pin pocket to right side of bag lining, matching top of pocket to contrasting fabric.
28 - Top stitch in place along sides and bottom.

29 - Mark the position and length of the handles to your preference. Mine were positioned 3" from the side seams, and 28" long.
30 - Right sides together, insert the bag lining into the main bag, matching side seams.
31 - Sandwich each handle in between the main bag and lining, the handle dropping down into the bag and the ends peeping up.
32 - Pin the heck out of everything.
33 - Sew all the way around the top edge, go slowly over the handles as you're sewing through many layers. I actually sewed this seam twice for strength.
34 - Trip and neaten the seam.
35 - Turn the bag the right way out through the hole in the lining.
36 - Close the gap in the lining with slip stitch (hand sewing) or top stitch (machine). Insert the lining into the bag and press with an iron. You can top stitch around the top of the bag if you like, I wanted to leave a clean edge so just pressed everything really well.
And voila! A gorgeous tote bag, lined, with a pocket and lots of lovely matching seams to admire. Well done and let me know if you have a go at making the bag, I love to hear what you think.
(Please note: tutorial for personal use only, not for resale)
Finally this enormous tutorial is ready. It's an epic, months in the making. Rejoice... for here comes the Fussy Cut Tote Bag!
Fussy cutting is a technique where the fabric is cut to take advantage of the pattern, so in my case the script needed to be centred and the correct way up. It's a technique often used in quilting, to showcase a motif within a quilting square but the same idea applies here.
Of course you can make the bag in any fabric you like, I just fell in love with this fabric and knew I wanted to make a summer bag with it.
And that's not an arty 'hand near my face' pose, I'm shielding my eyes, it was actually sunny when we took these photos. Yes, my summer bag brought the sunshine to England...rejoice again people!
The bag is ultra roomy because the "travel light" concept is totally alien to me, "just in case" is my mantra. It's also fully lined and has a little interior pocket too.
Read on for a step by step tutorial. You know me, I've probably gone into too much detail, but better more than not enough.
Fussy Cut Tote Bag Tutorial.
Gather your supplies
1 - Gather your fabrics - 1 yard main fabric (medium or décor weight), 1 yard lining fabric, half yard contrasting fabric for bag top & handles, quarter of a yard of fabric for accent on handles.
2 - My main fabric was a table runner - I try and think outside the box for sources of fabric.
3 - Because the table runner was only 19" wide, I had to unpick the hemmed edges to give me as much fabric as possible.
4 - I bought the plain grey linen from Ebay, look how the seller sent it, so cute (free crochet trim too!)don't you just love getting parcels like this in the post?
Cut the pieces
5 - Exterior: from your main fabric cut:
Front/back: 19" x 13" - 2 pieces. (I fussy cut the front piece of the bag to show as much of the writing as possible)
Bottom: 19" x 3" - 1 piece
Sides: 13" x 3" - 2 pieces
Patch pocket (not shown sorry!): 7" x 8" - 1 piece
6 - Lining: repeat cutting the same sizes and pieces from the lining fabric.
7 - Bag top: from the contrasting fabric (grey linen in my case) cut:
Bag top 19" x 3" - 4 pieces
Top sides 3" x 3" x 4 pieces
Note: In my case the linen is a lighter weight fabric than my main décor weight fabric, so I also cut matching fusable interfacing pieces to give the linen more strength and weight. You may or may not need to do this depending on the types of fabric you choose. Apply the fusable interfacing if you need it.
8 - Handles: from your contrasting fabric and accent fabric cut:
Contrasting fabric: 34" x 2 " - 2 pieces
Accent fabric: 34" x 2" - 2 pieces
Note: neaten all edges as you go along (zigzag/serger or pinking shears) and use 1/4" seam allowances.
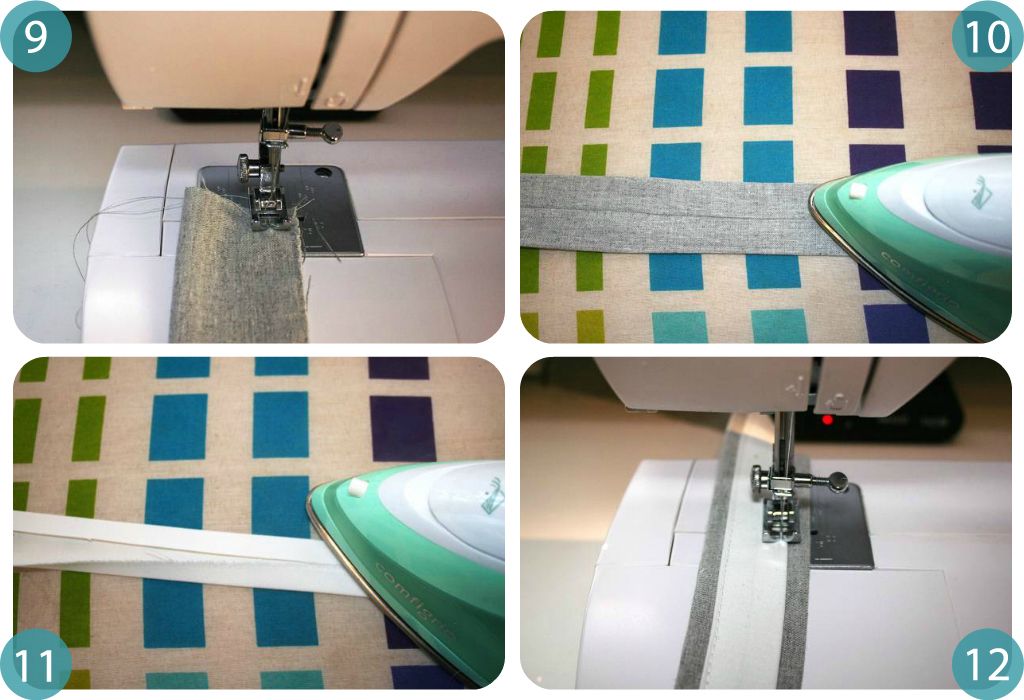
Make the Handles
9 - Fold main handle piece (contrasting fabric) in half lengthways, right sides together, and sew seam.
10 - Pull the tube through, right side out and iron flat with the seam in the middle.
11 - Fold 1/4" over on the accent fabric, along both long edges, wrong sides together and press.
12 - Top stitch the white accent onto the main handle piece, covering up the centre seam. Repeat for second handle.
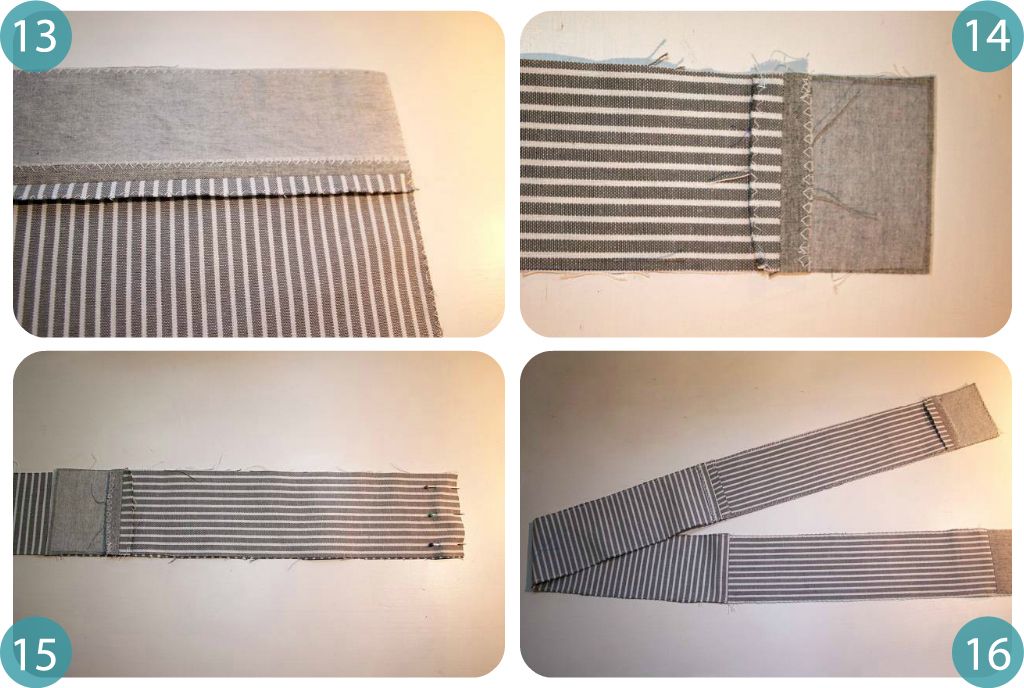
Assemble the exterior
13 - Pin the main front and contrasting top pieces right sides together (making sure the front piece is the correct way up fussy cutters!), sew seam and press open. Repeat for bag back.
14 - Pin the bag side (along short edge) and contrasting side top piece together, right sides touching, sew seam. Repeat for other side piece.
15 - Pin side piece to bag bottom, right sides together and sew seam.
16 - Repeat for other side piece, press all seams open, giving you a long piece of fabric as shown in the photo.
17 - Pin the bag bottom to the main bag piece right sides together, matching the centres. Continue pinning the sides to the sides of the main bag piece.
18 - Sew seam, easing as you go around the corners.
19 - Trim corners to reduce bulk and neaten edges. Repeat for the bag back section.
20 - Turn bag right sides out. Smile if all your seams meet perfectly at the corner :-)
21 - Give everything a good press and your main bag section should now look like this.
22 - Grin if all your seams meet perfectly at the bag top :-)
23 - Repeat all steps for the lining pieces but....
24 - ....remember to leave an opening in one of the bottom seams for turning.
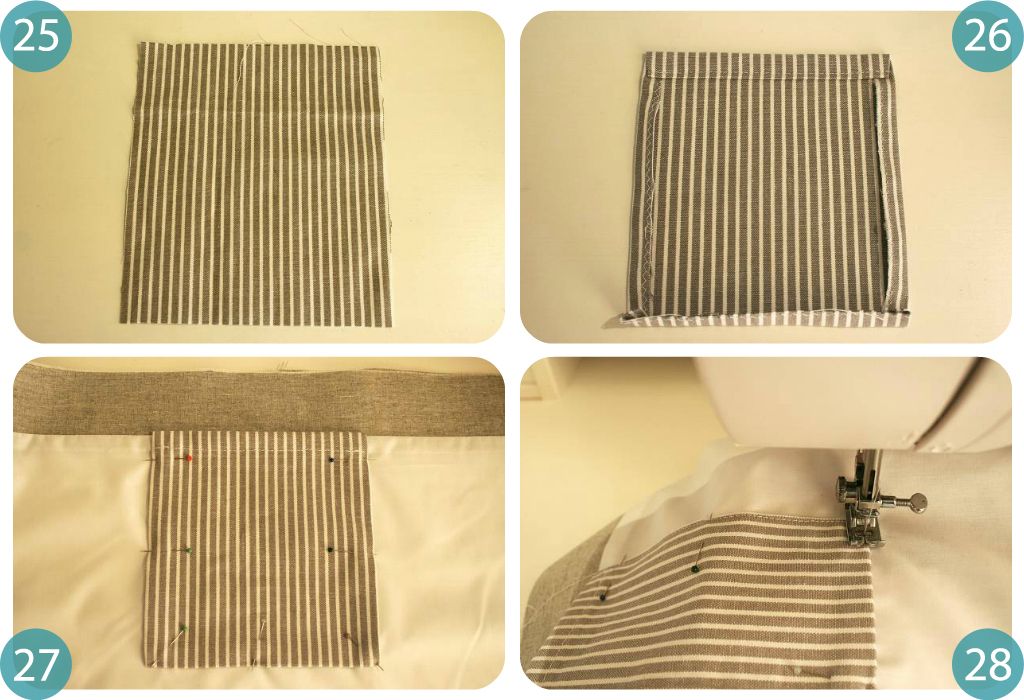
Patch Pocket
25 - Neaten edges on the patch pocket.
26 - Fold 1/4" over to wrong side on bottom and both sides, press. Fold top edge over twice to create a hem and top stitch in place.
27 - Pin pocket to right side of bag lining, matching top of pocket to contrasting fabric.
28 - Top stitch in place along sides and bottom.
Attach lining & handles
29 - Mark the position and length of the handles to your preference. Mine were positioned 3" from the side seams, and 28" long.
30 - Right sides together, insert the bag lining into the main bag, matching side seams.
31 - Sandwich each handle in between the main bag and lining, the handle dropping down into the bag and the ends peeping up.
32 - Pin the heck out of everything.
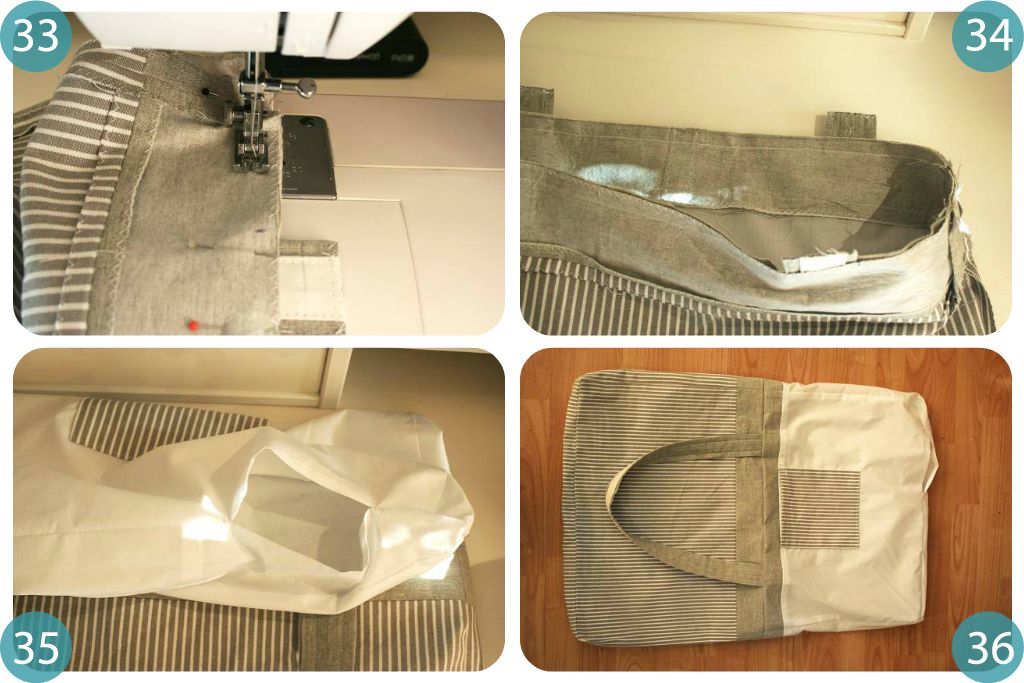
Nearly there!
33 - Sew all the way around the top edge, go slowly over the handles as you're sewing through many layers. I actually sewed this seam twice for strength.
34 - Trip and neaten the seam.
35 - Turn the bag the right way out through the hole in the lining.
36 - Close the gap in the lining with slip stitch (hand sewing) or top stitch (machine). Insert the lining into the bag and press with an iron. You can top stitch around the top of the bag if you like, I wanted to leave a clean edge so just pressed everything really well.
And voila! A gorgeous tote bag, lined, with a pocket and lots of lovely matching seams to admire. Well done and let me know if you have a go at making the bag, I love to hear what you think.
(Please note: tutorial for personal use only, not for resale)


Comments
Have a great day!
See you again,
ciao
thanks!!!
Post a Comment
I love reading your comments, so let me know what you think! x